Hotel Room Photography: Make the Most of Small Spaces and Boring Locations
What you see…what the camera sees!
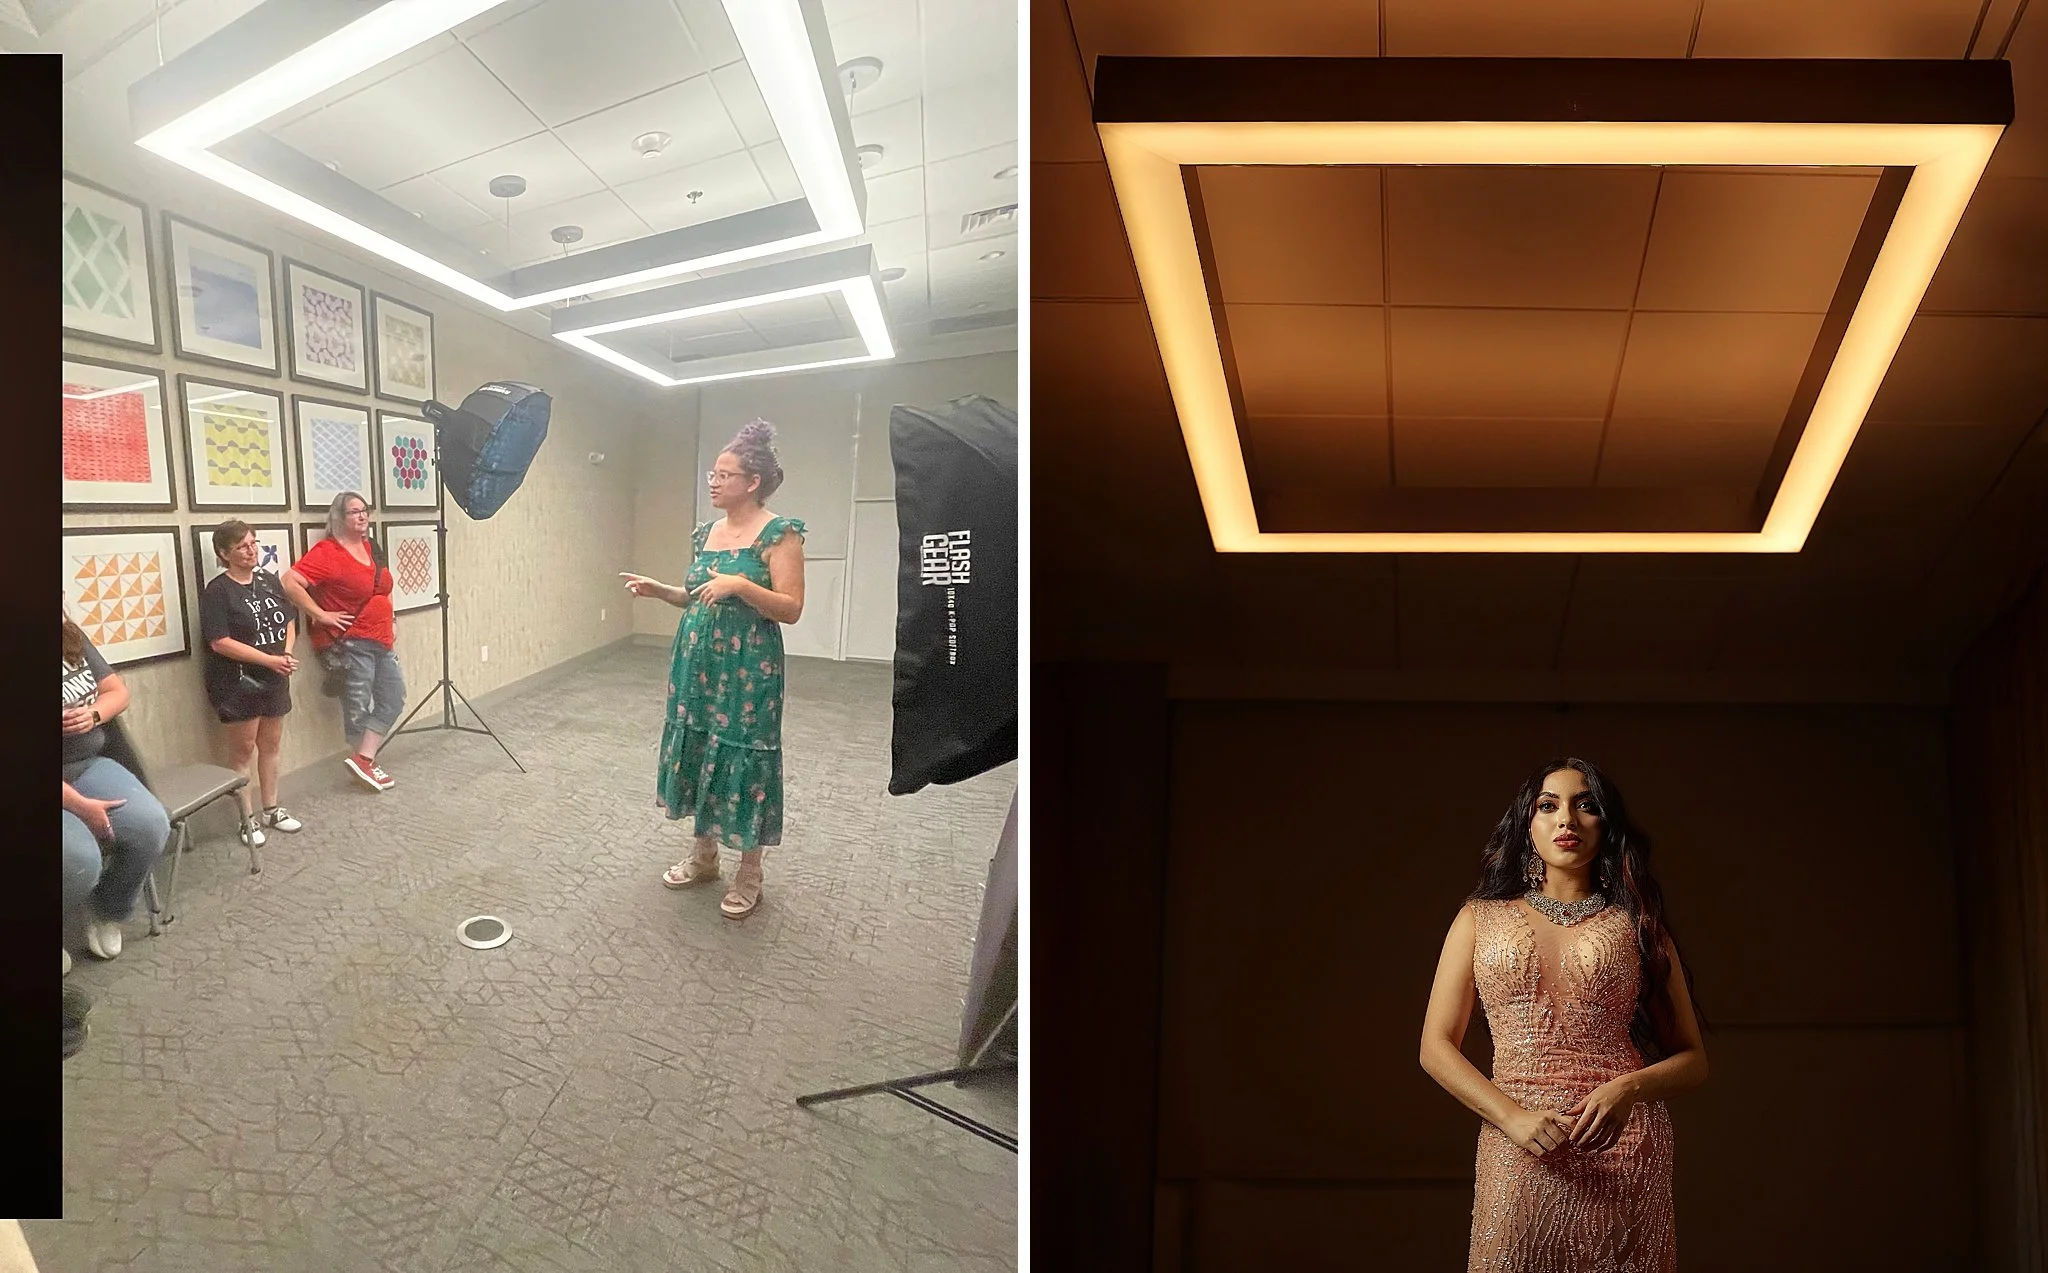
During my recent photo walk with the Arkansas Professional Photographer Association, I revisited one of my favorite lessons in lighting: the difference between what we see in a room and what the camera sees.
If you’ve ever walked into a space and thought, “There’s nothing here to work with,” this post is for you. Because once you understand how to shape light and control your composition, you can create something striking out of almost nothing.
These principles apply to event lighting, wedding lighting setups, reception flash techniques, and off-camera flash for weddings, giving photographers reliable tools to create consistent, flattering images in any venue.
And that’s where the magic really begins…
I prefer to use the existing room light as a starting point.
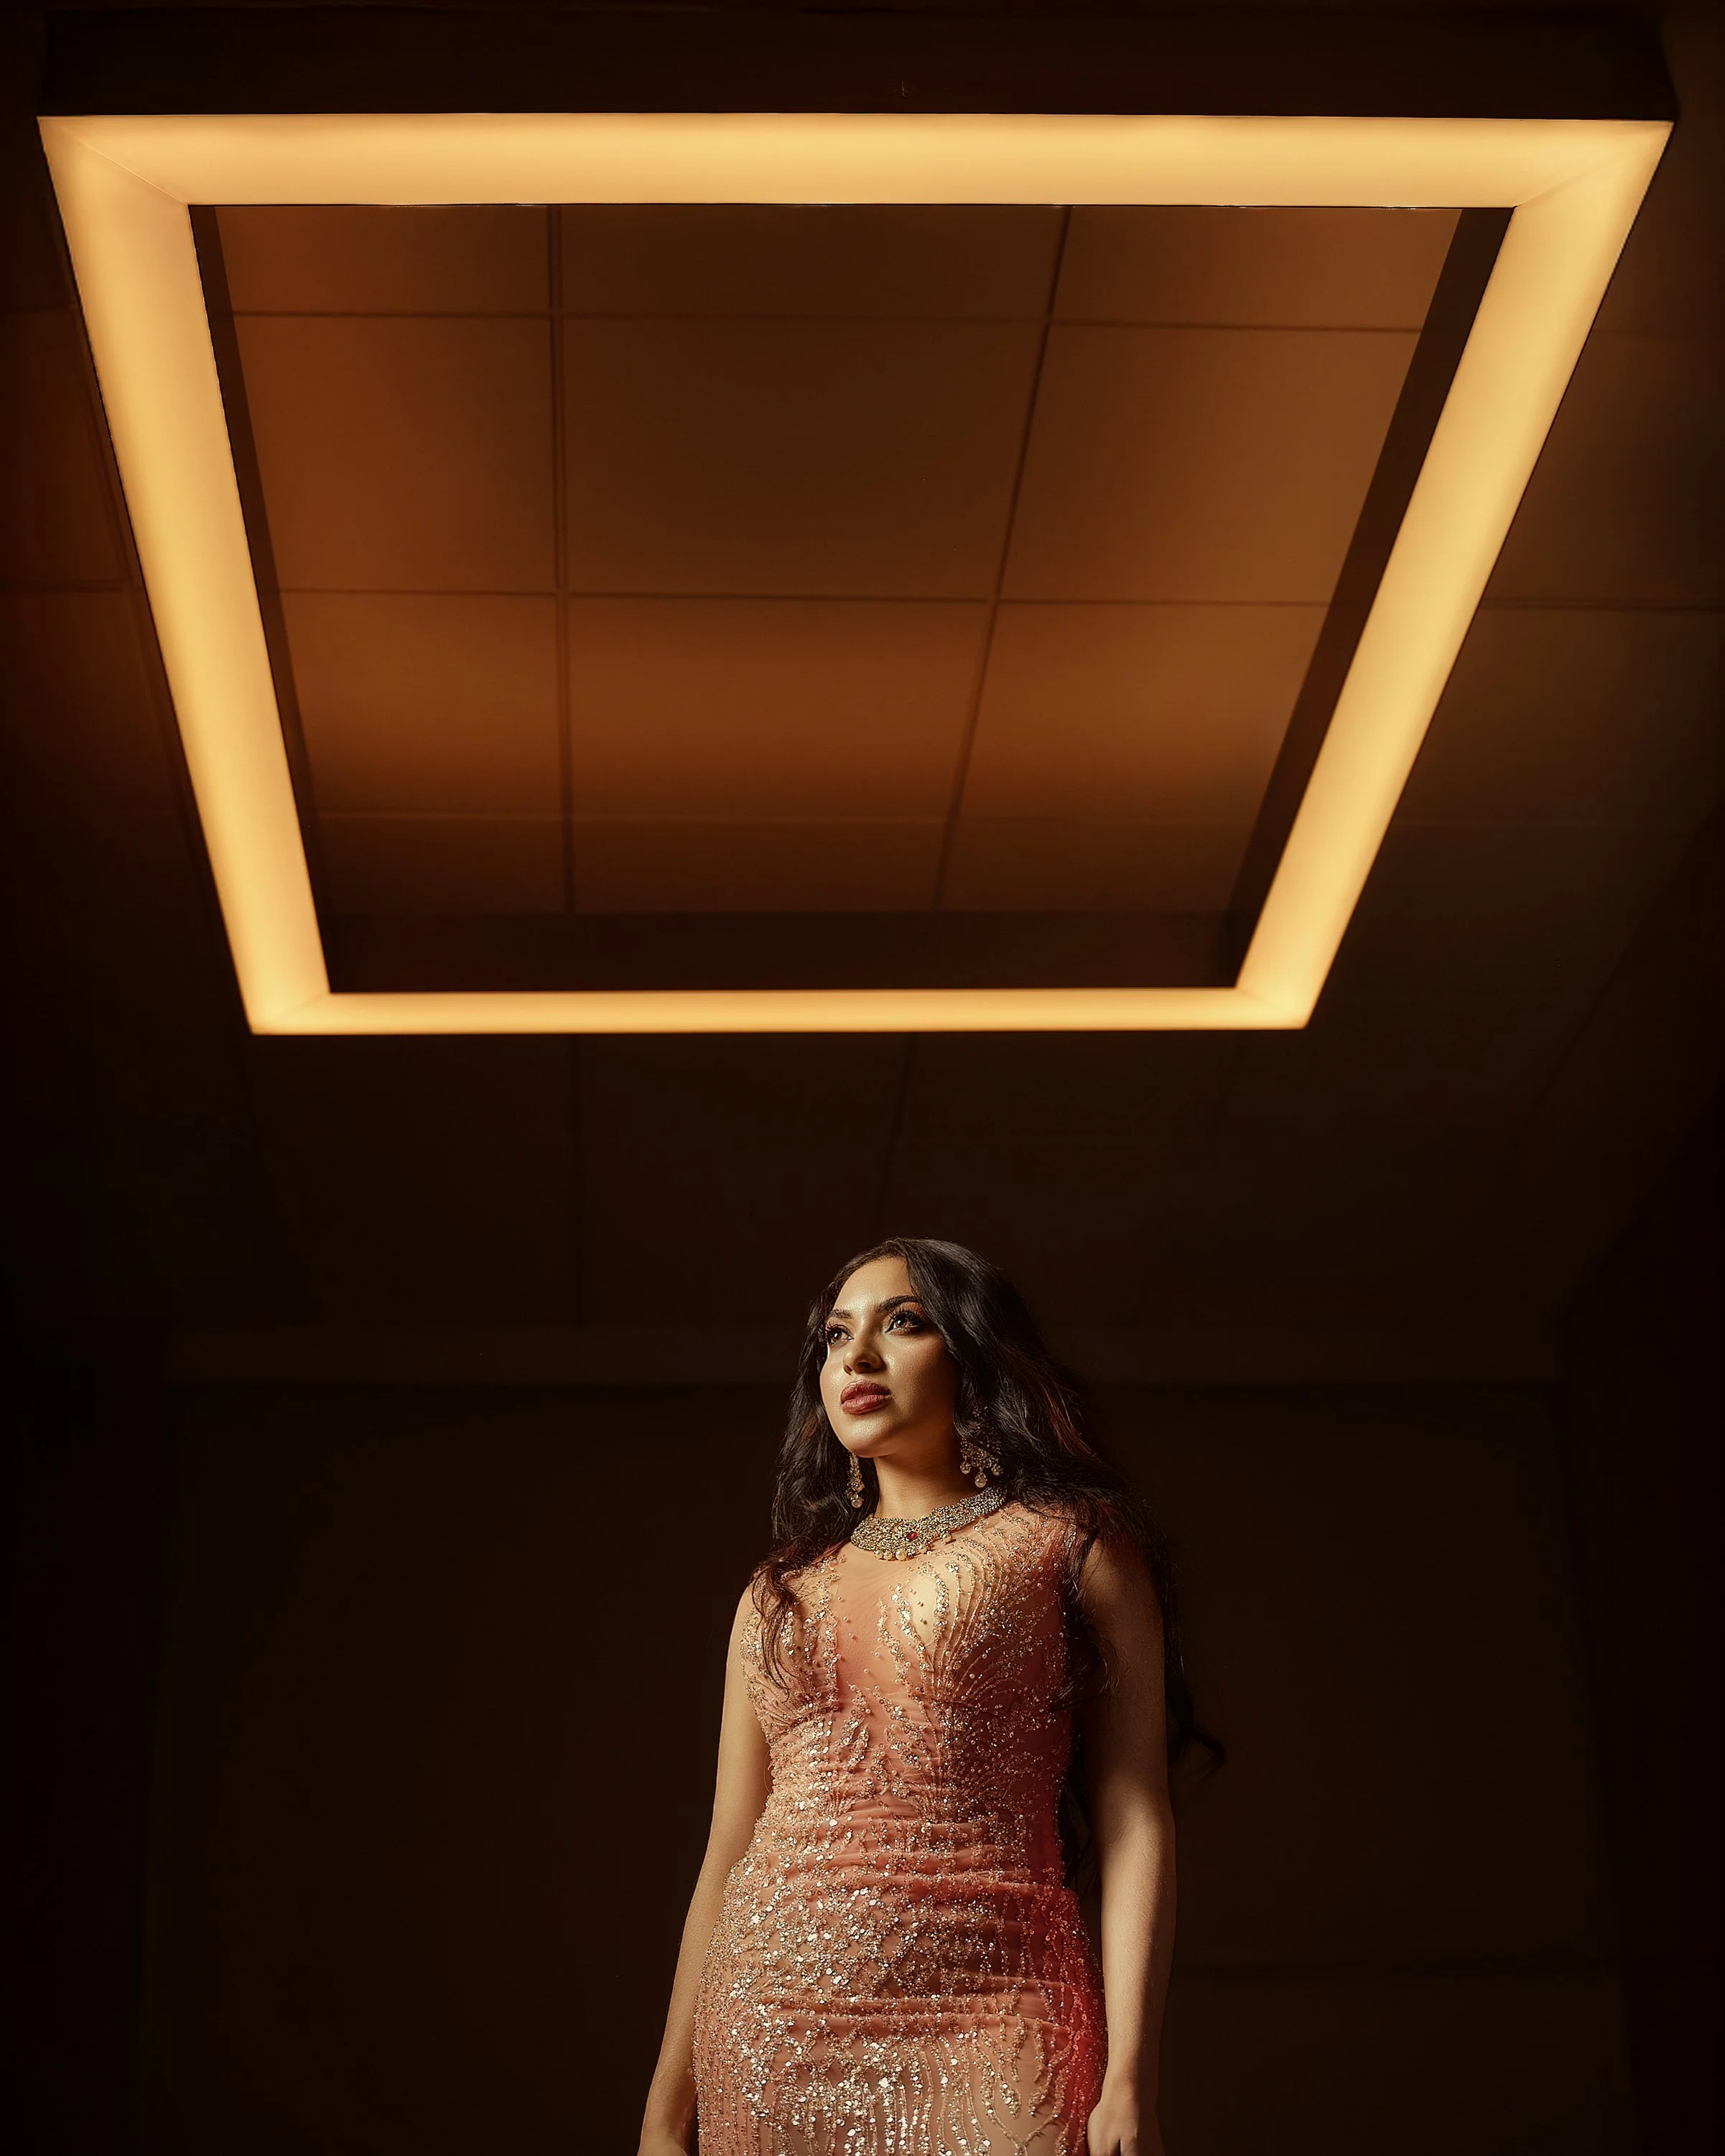
In this particular setup, the ambient light in the room became my guiding inspiration. The shape of the light was the only really interesting thing in this area. I decided it could be a way to frame the subject. All I need was one off-camera flash to “finish” what the room had already started.
How One Light Transformed the Scene
By introducing one off-camera flash, I could:
create separation between subject and background
add drama where none existed
only light what was interesting in the room
build a visual story that tells the viewer what to look at
Lighting is less about equipment and more about decision-making. And in small or “uninspiring” spaces, those decisions matter even more.
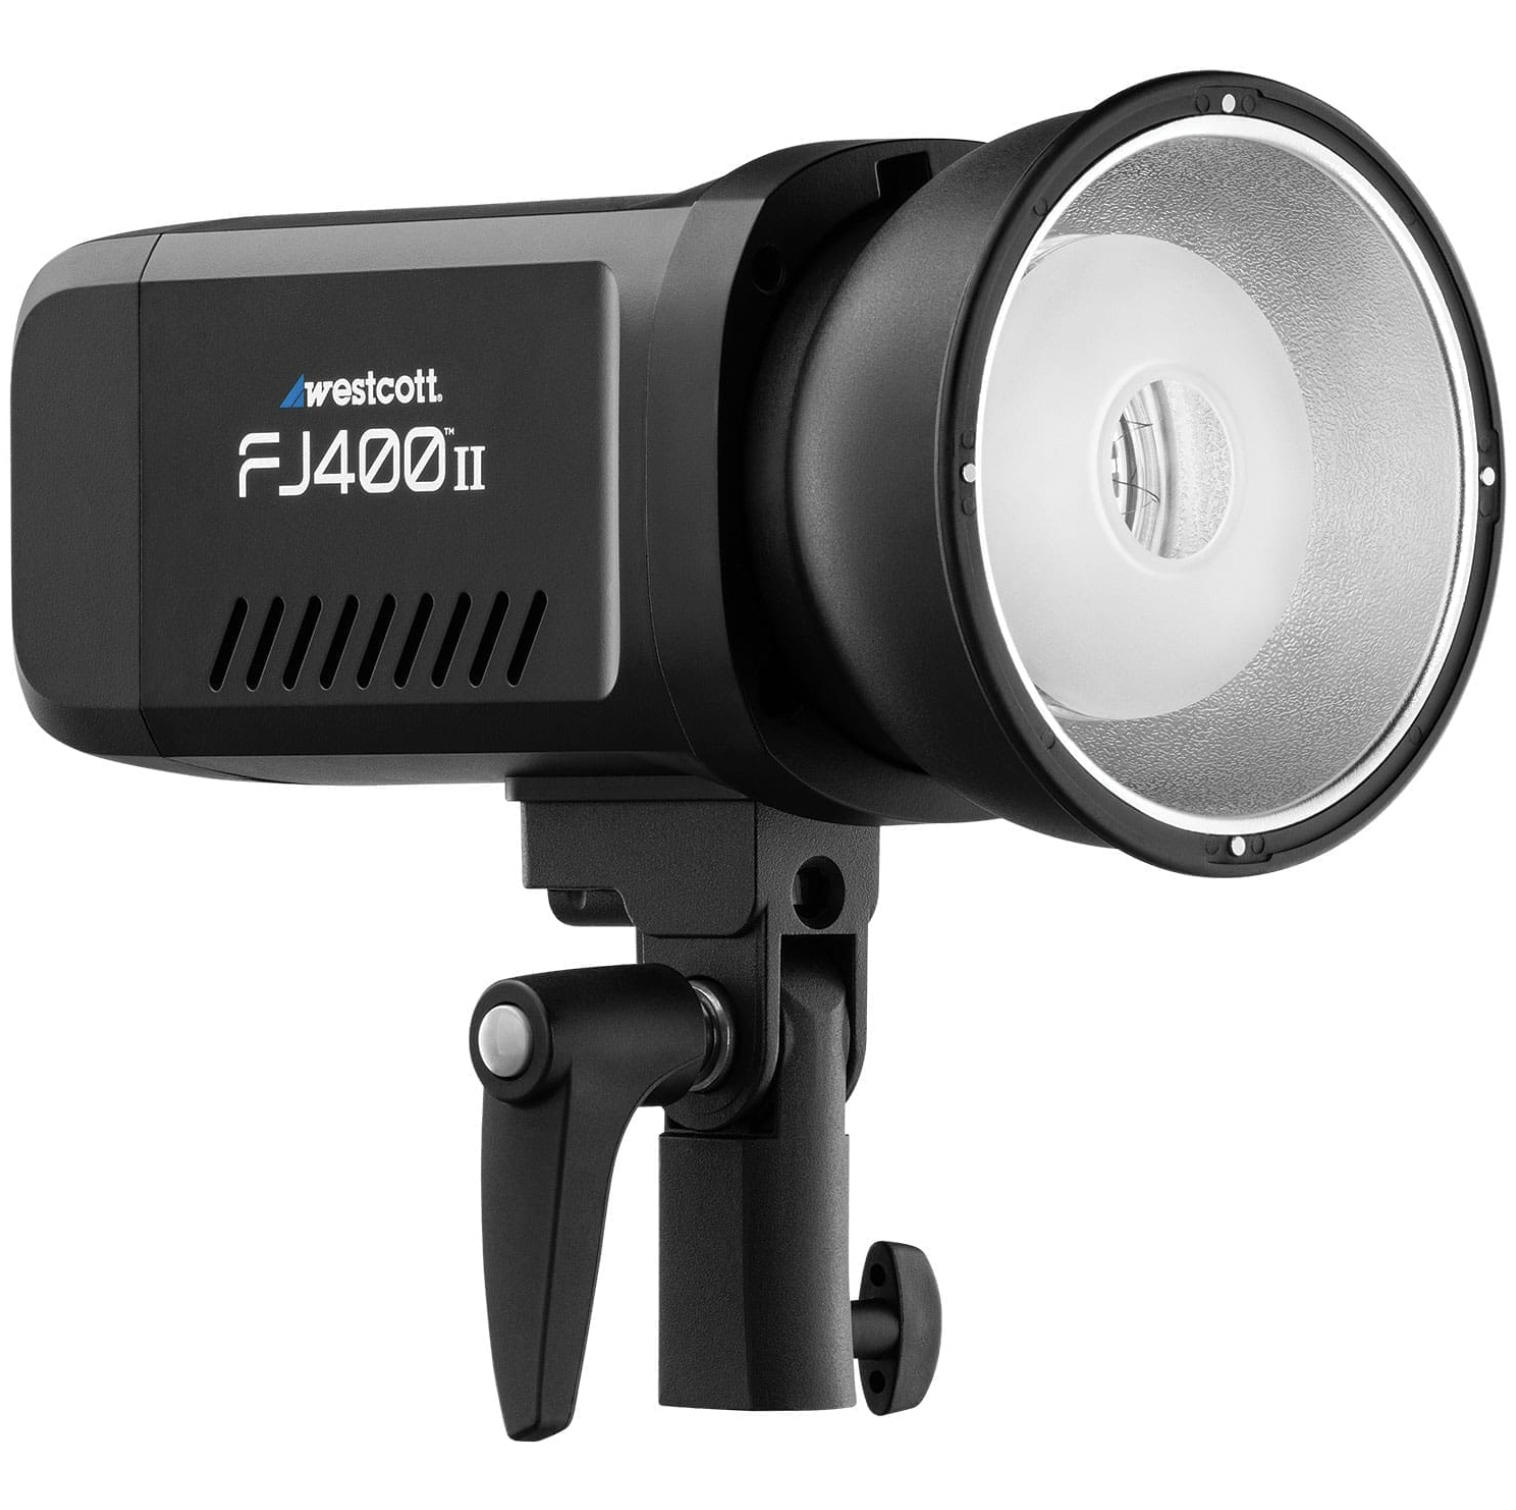
Westcott FJ400ii
This light is battery operated and perfect for on location creativity with many possibilities.
Click here to learn more.
1. Let the scene guide your choices
This is where creativity starts. Before adding any flash, take a moment to:
observe what the room is giving you
decide which elements you want to highlight or hide
turn the flash OFF and take a test shot to study the ambient
The goal isn’t to fix the room—it’s to use it.
When you approach a space with curiosity instead of frustration, you’ll notice opportunities everywhere: a practical light, a reflective surface, a shadow you can build upon. Or in this case, an interesting light fixture.
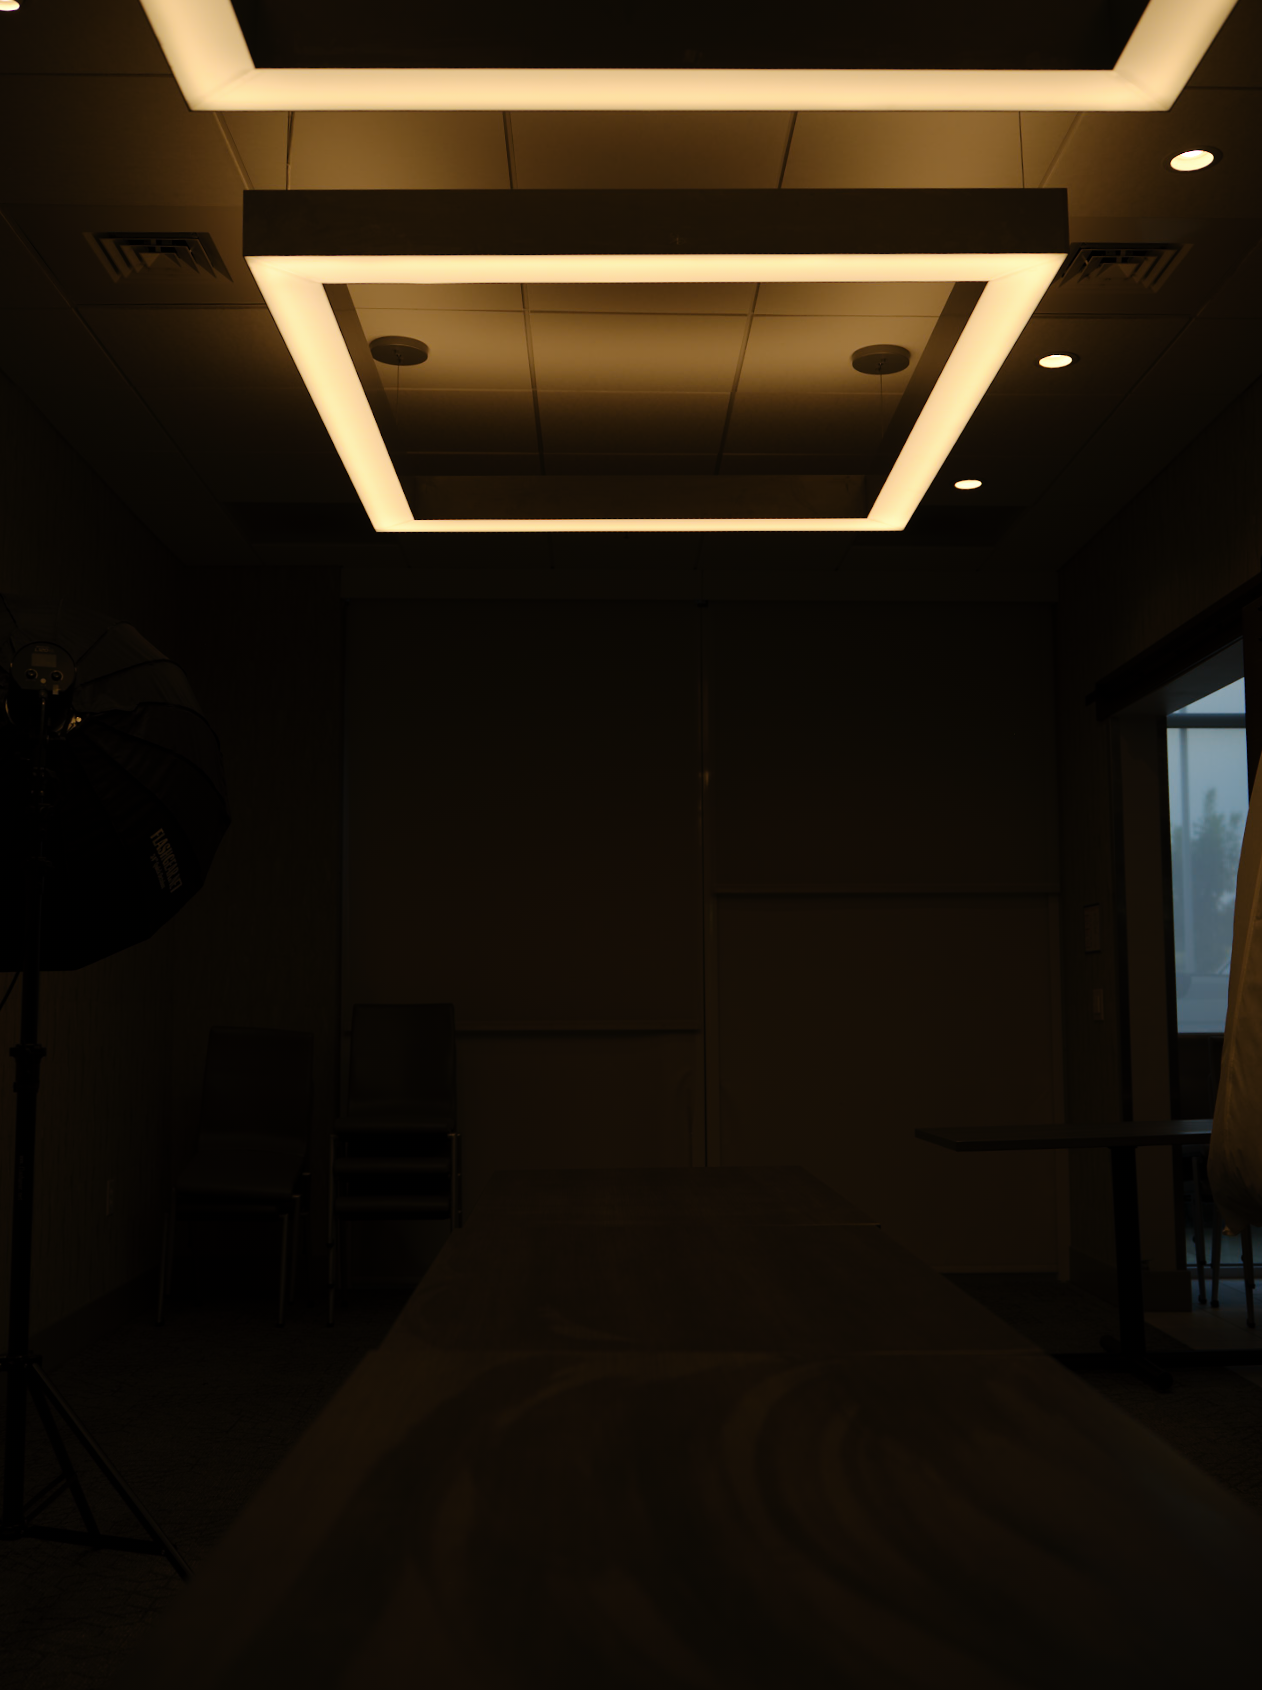
The test shot!
Here’s where I started, with just exposing for the lights in the scene.
CAMERA AND SETTINGS:
Fujifilm GFX100s II + GF23mm
ISO 400 - f/4 - 1/125
2. Use a small modifier with a grid
I decided in this room, all I needed to do was light my subject, and leave the rest in the dark. A small softbox paired with a grid gave me the control I needed.
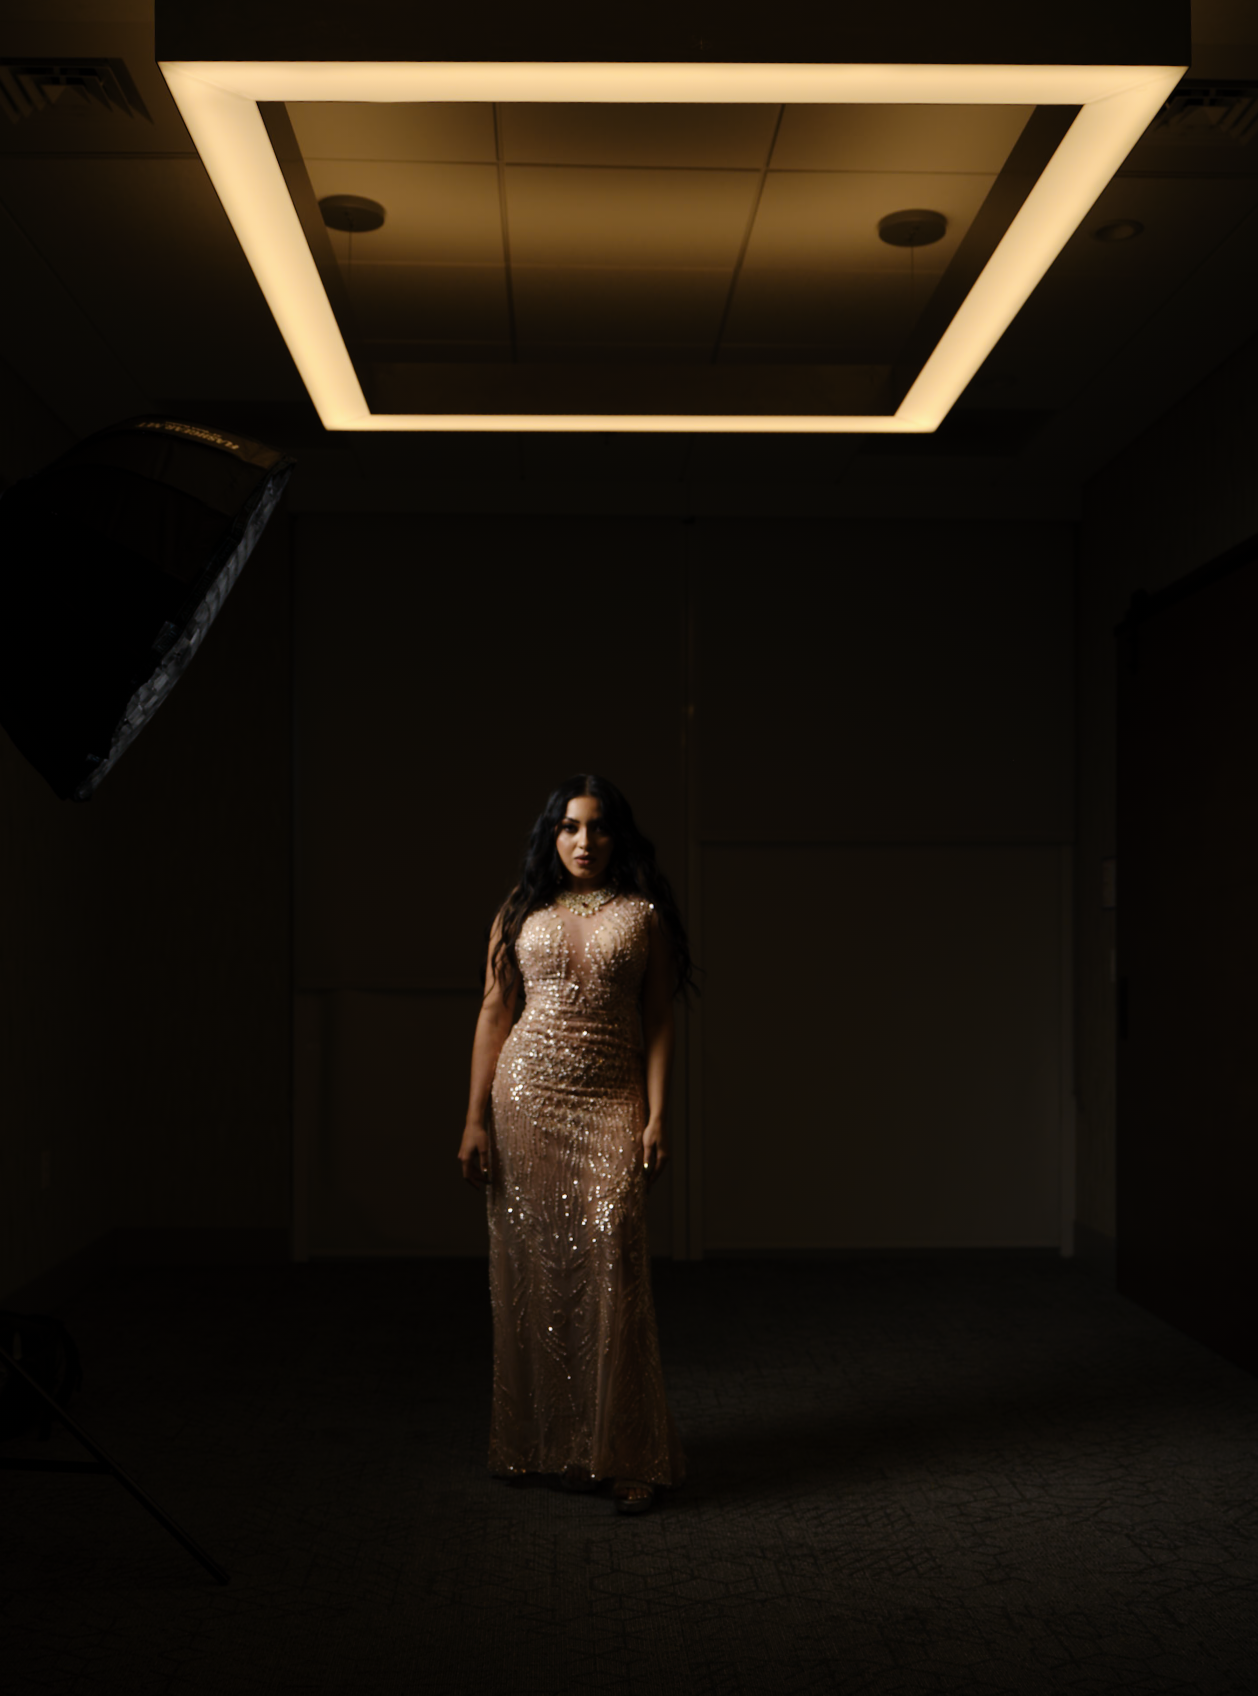
Bringing in the light!
Positioning the light to the side prevents light from spilling on the back wall. You may need to get creative with light position and shooting angle to keep the soft box out of the frame…or, as long as you don’t position the modifier over anything important in the scene, rely on Photoshop tools to remove later.
The grid is essential because it:
prevents spill on the walls
keeps attention on the subject
does not change the quality of light
This is where Flashgear shines. Every Flashgear softbox includes a grid, which makes a huge difference when shooting in small or cluttered spaces. (If you know, you know.)
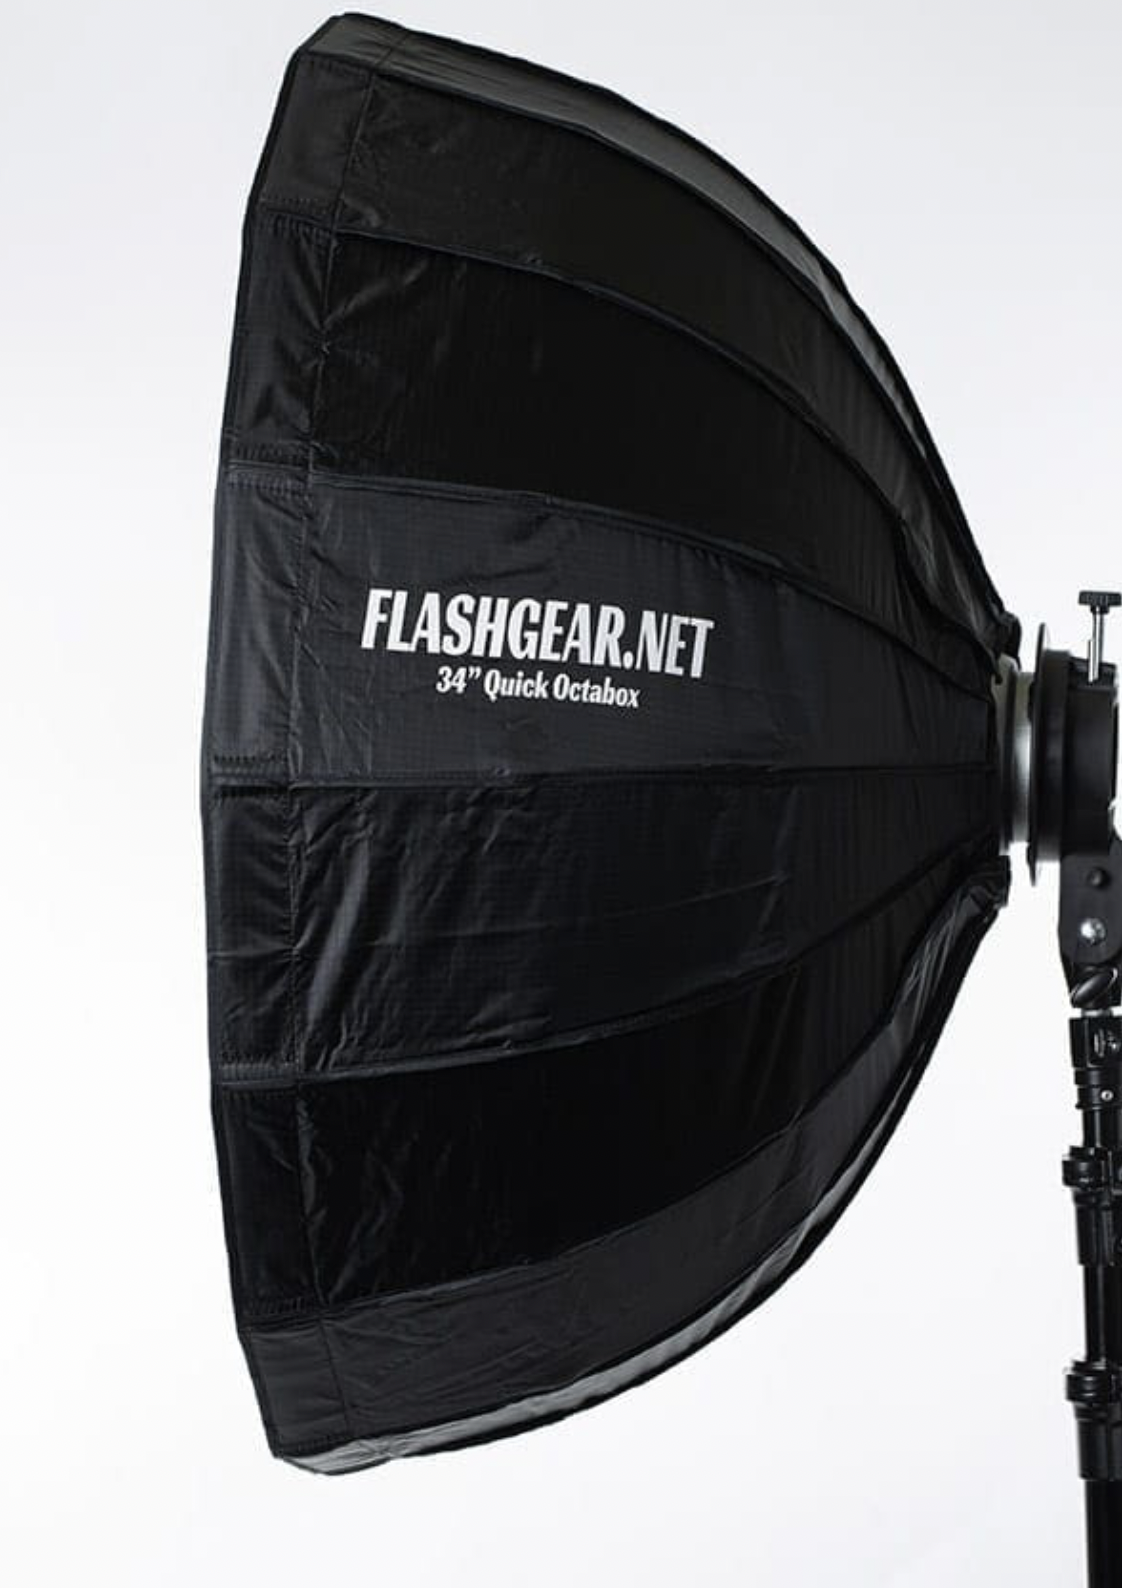
Flashgear 34” Quick Octobox
It gives even light with just the right contrast and pop—perfect for dramatic portraits anywhere.
3. Composition matters as much as lighting
Lighting sets the mood, but composition directs the story.
I chose a low shooting angle to add drama and power to the pose, but that angle comes with a challenge: distortion. Anything closer to the lens appears larger—sometimes hilariously so.
To correct this, I had the subject lean slightly forward, bringing her head and torso closer to the camera so the proportions remain flattering.
A small adjustment with a huge impact.


It’s your turn to get inspired!
At the end of the day, creating something beautiful in a less-than-ideal space isn’t about luck or gear…it’s about understanding how light behaves and how your camera interprets a scene.
When you combine intentional lighting, thoughtful composition, and the willingness to let the environment guide your choices, even the simplest room becomes a canvas. Mastering this mindset frees you from waiting on perfect conditions and empowers you to create anywhere, anytime. That’s where real growth happens…and where some of the most surprising, satisfying images are born. Have fun creating!
If this blog post inspired you, I would love to hear from you! Drop me a line and share what you’ve created! It may even get featured in our Facebook lighting group!
Special thanks to model @selenypineda5 for working with us, to the APPA for the opportunity to share, and Matthew Sewell for helping assist on the set.